OneVariable Newsletter - 2022-01-12
2022-01-12This article was originally featured on the OneVariable Applied Research newsletter. If you'd like to get early access to these reports, you can sign up for the newsletter here. Newsletter emails are sent every Wednesday.
Articles are posted on my blog one week after appearing on the newsletter.
Abstract and Results
Happy new year! I took the last week off of the newsletter, as I found myself stuck and a little frustrated with the progress on getting the network stack up and running.
I did get the RS-485 network stack re-integrated with Anachro, at least enough to compile, but I haven't sat down to work through the integration bugs and get the full communications stack stable and running.
After a couple of tedious weeks troubleshooting some challenging driver problems, I needed some "easy gimmes" to get myself back excited to work on the Powerbus Mini stack.
Since I don't have a deadline, it was more fun to give myself a distraction for a week or two to recharge!
So this week, enjoy a small highlight reel of the one-off and conceptual projects I worked on instead!
Here's a quick list to get started:
- I assembled three more Powerbus-Mini boards, though only two survived
- I played around with an Adafruit Servo Pan/Tilt kit, as a simple Expansion Card
- I built a White/Warm White/Amber light bar, to act as an indirect room light
- I built an RGB light bar, as well as built a Powerbus Expansion-to-feather adapter, to connect to a Solder Party FeatherWing
- Using the RGB Light + FeatherWing, I started an "activity tracker" project, including a keyboard + LCD user interface
- I wrote the toml-cfg crate, to deal with non-binary configuraton values, like I use in the Anachro Protocol crate
Background Information
First off, I built three more Powerbus Mini boards. While assembling, I did have a couple of issues, where two of the boards refused to interface with the Flash chip over QSPI, and one board where the USB port did not have a reliable connection.
While trying to fix the USB port with a hot air station, I managed to break the board in some other way, so this board is unfortunately out of operation, at least for now. Rather than rework the other boards, I noticed that "regular SPI" mode still worked on the other two boards, so I'm using that as a workaround for now.
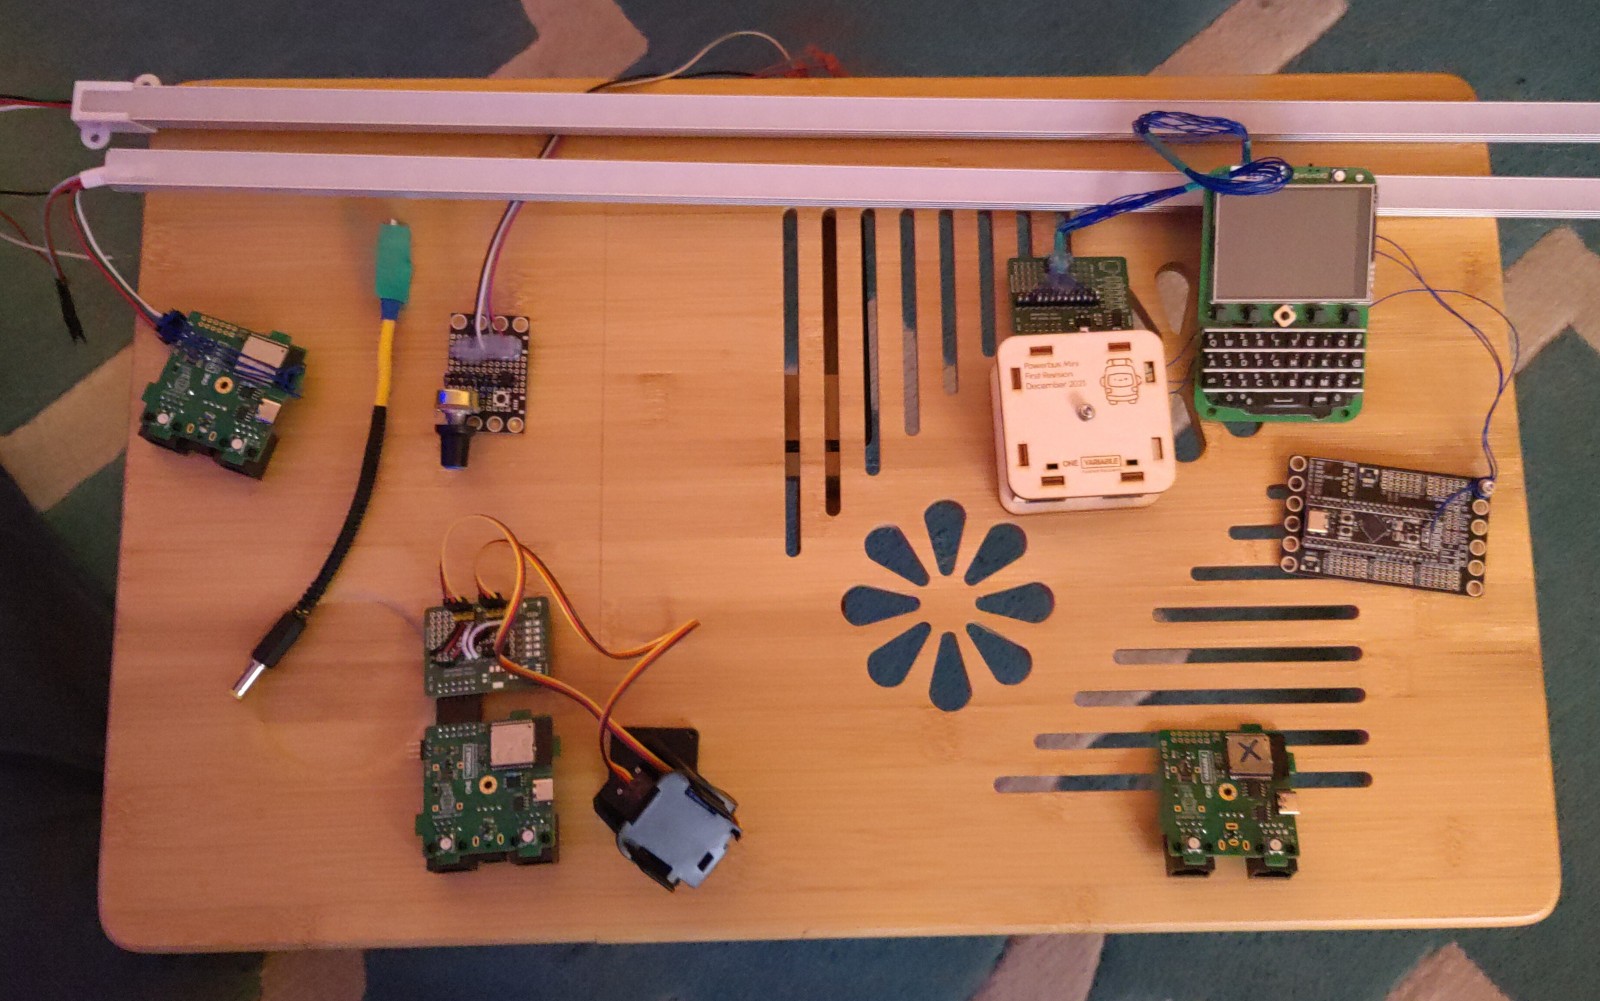
A whole family picture of the current batch of Powerbus Minis
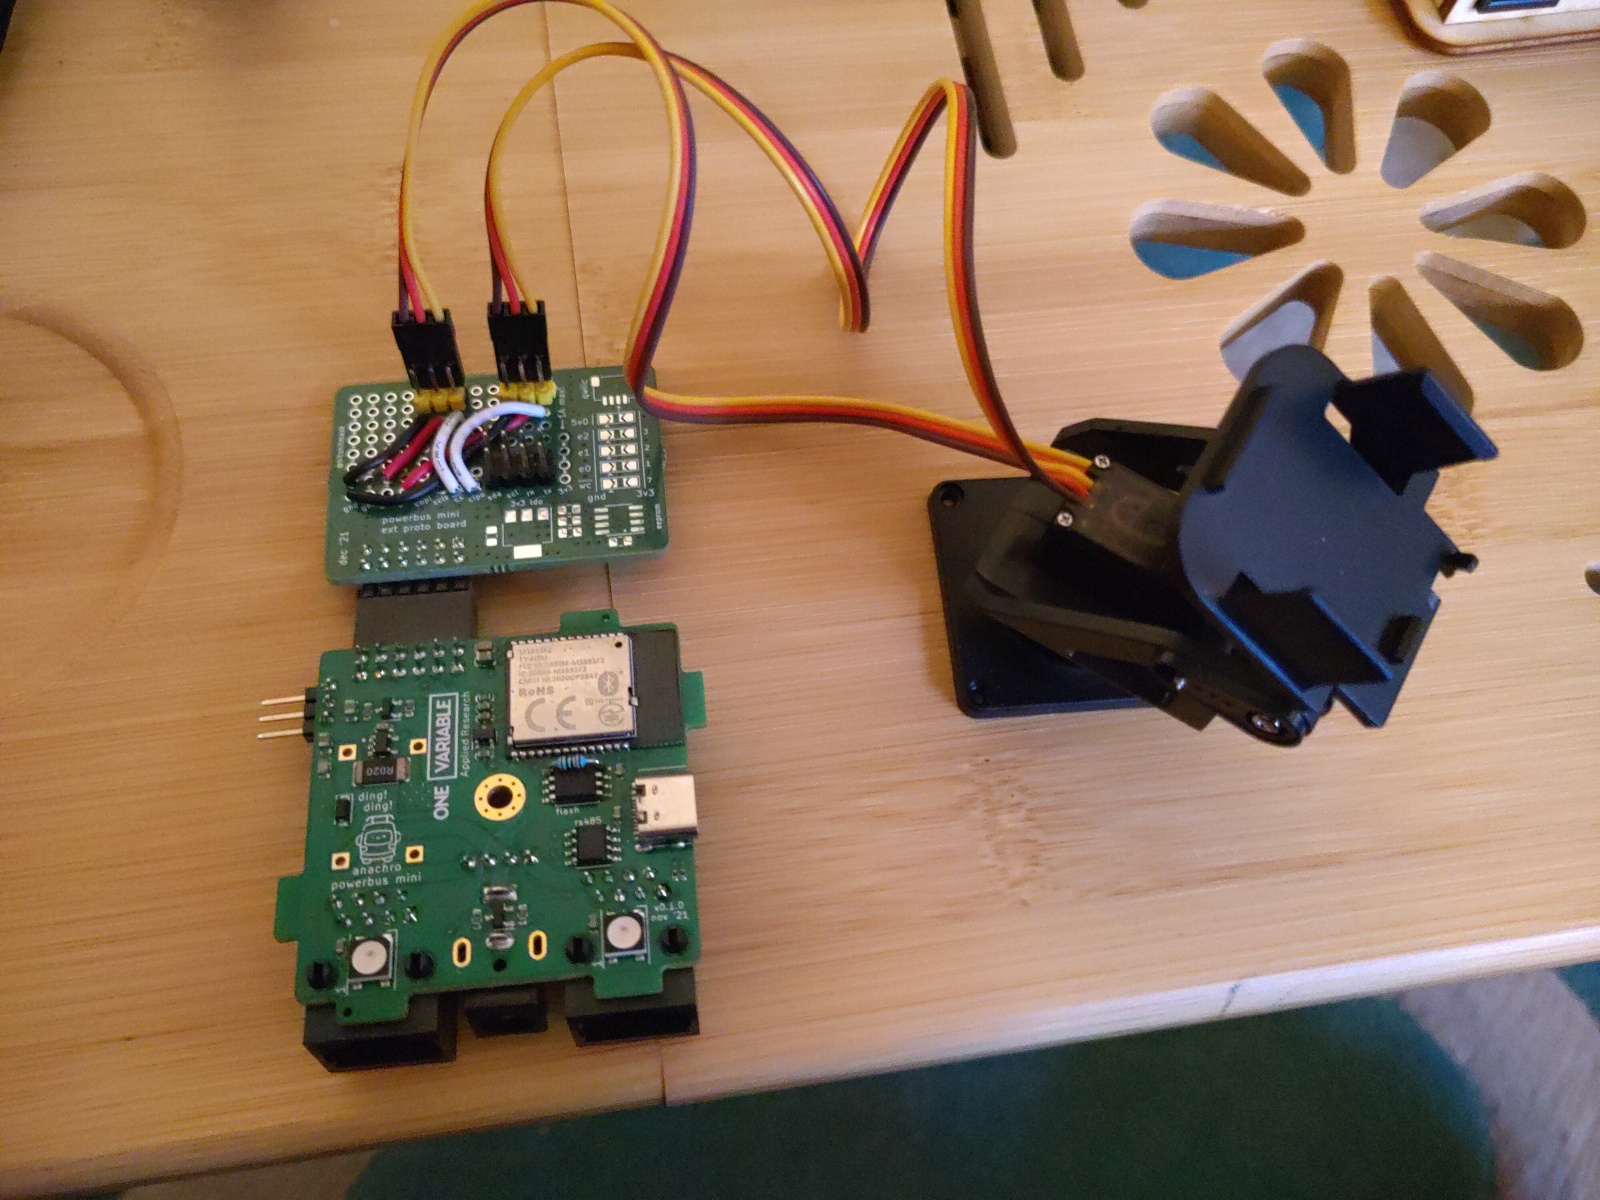
My first "distraction" project was to assemble and integrate an Adafruit Mini Pan/Tilt Servo Kit. I used a Powerbus Expansion card to break out the 5V rail in order to power the servos, and two PWM lines from the nRF52 to control them.
I haven't done much with this project yet, but it was fun to get the motors up and moving, as a change from my typical "all LEDs" output. You can see a short video of the servos in "party mode" here:
PARTY HARD PARTY HARD pic.twitter.com/jz8pqq3up2
— james.poll_on()?; (@bitshiftmask) January 1, 2022
Powerbus x Pan/Tilt Servo Kit Collab
I think in the future, I'll mount two or more of my 6x8 LED character displays acting as "eyes", to make a little emotive robot friend. You can check out Lixie Lab's Pixie Chroma Test Jig for the kind of things that are possible! I might even add a third servo for the "face", so the robot can do the cute "dog head tilt" emote.
6x8 LED character displays
A slightly better video with some sunlight, no white pixels, and 1/8th max brightness. Still a little painful to look directly at.
— james.poll_on()?; (@bitshiftmask) October 12, 2021
(video alt: fading colorful LEDs on two small circuit boards) pic.twitter.com/rda0ioP54q
Lixie Labs Test Jig
I'm excited to introduce our newest employee! 💜💜
— 𝕃𝕚𝕩𝕚𝕖 𝕃𝕒𝕓𝕤 (@lixielabs) December 2, 2021
This cute blinky box is our Pixie Chroma test jig. It checks the voltage drop for each channel of each LED, and verifies data/power continuity out of the DUT as well. :) pic.twitter.com/WvckFsYBlc
Next up, I wanted to try out some of the White/Warm White/Amber LED strips that I ordered a while back, to use as ambient lighting around my house.
You can see the full one meter light bar (in an aluminum housing with diffuser) above in the "family picture", but I also built two special accessories for this project: A power dongle, and a user-interface board.
Light Bar Controller Components
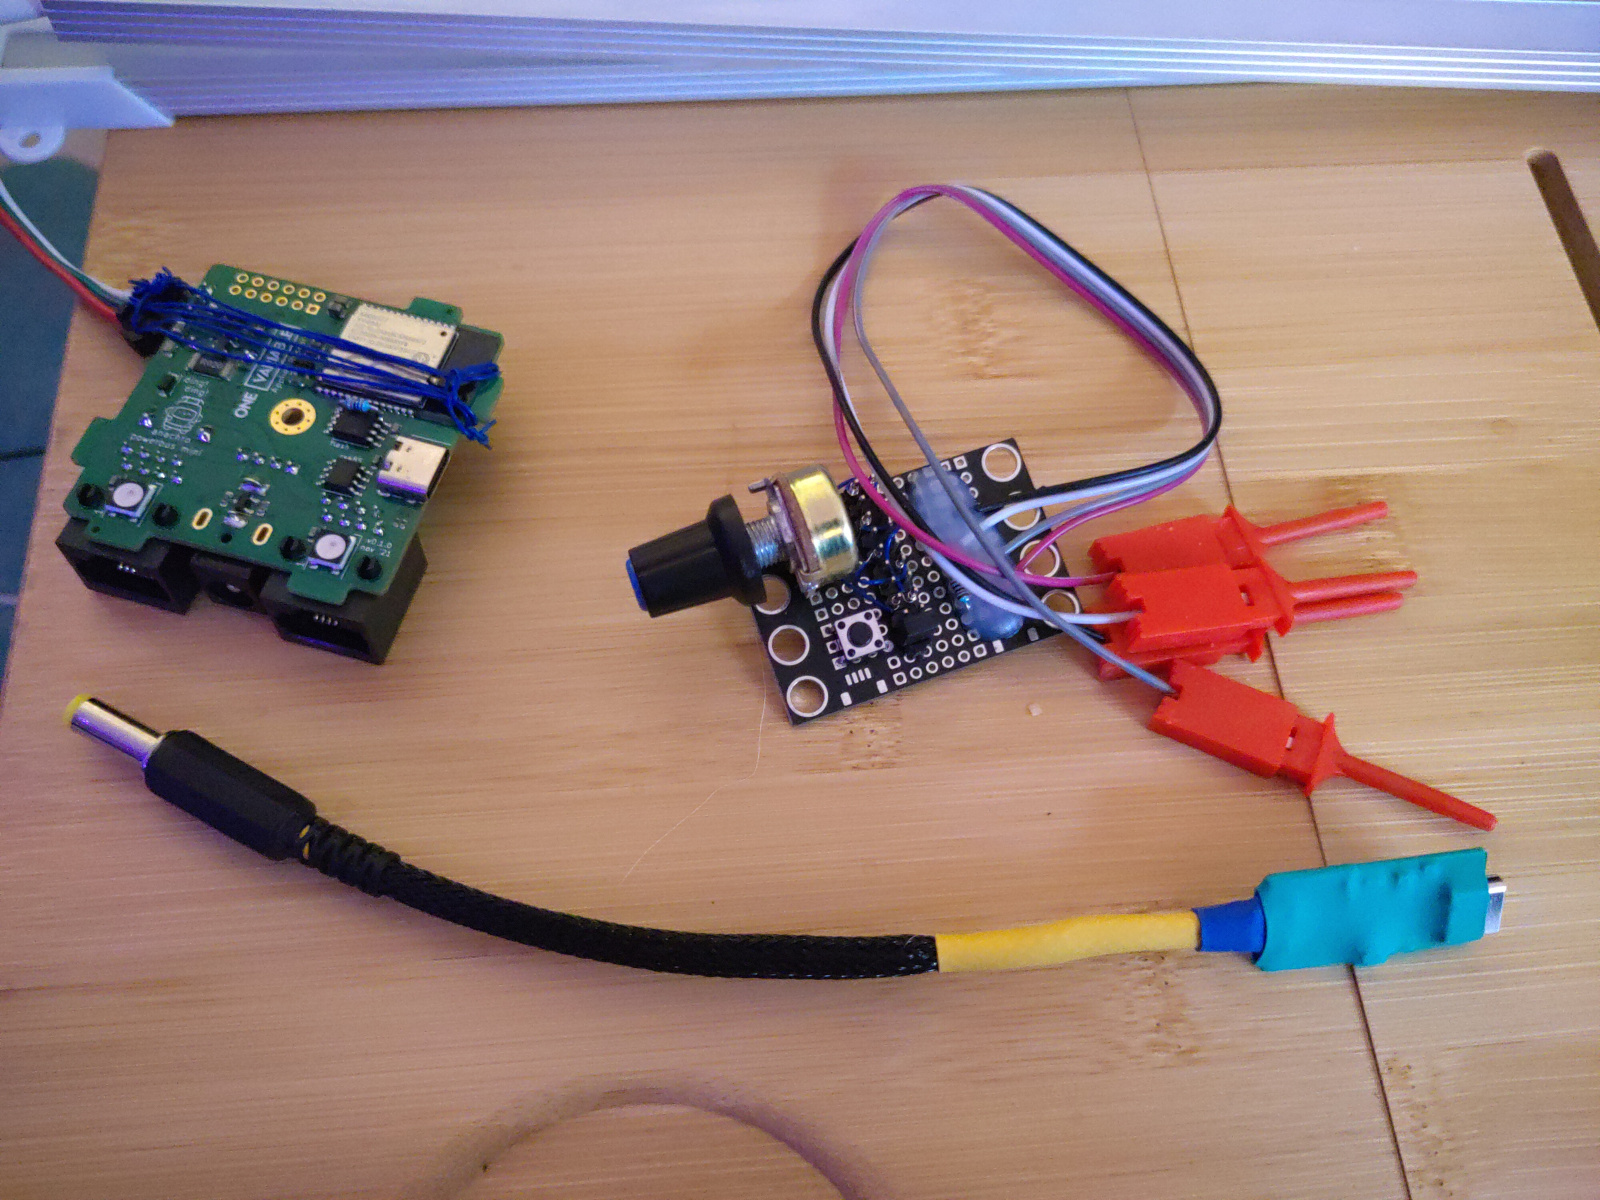
The first (shown at the bottom) "USB-C to Barrel Plug" adapter cable, which includes a "USB-C Decoy", which negotiates 20V3A power from a USB-PD supply, like you would use with a laptop or tablet charger.
The second (shown top right) is a simple board that contains a 10K potentiometer dial, as well as a single button. I designed this with hook probes, so I could tweak around the connections, but it is annoyingly easy to detach, so I'll probably remake the input board on an Expansion card.
One deployed Light Bar!
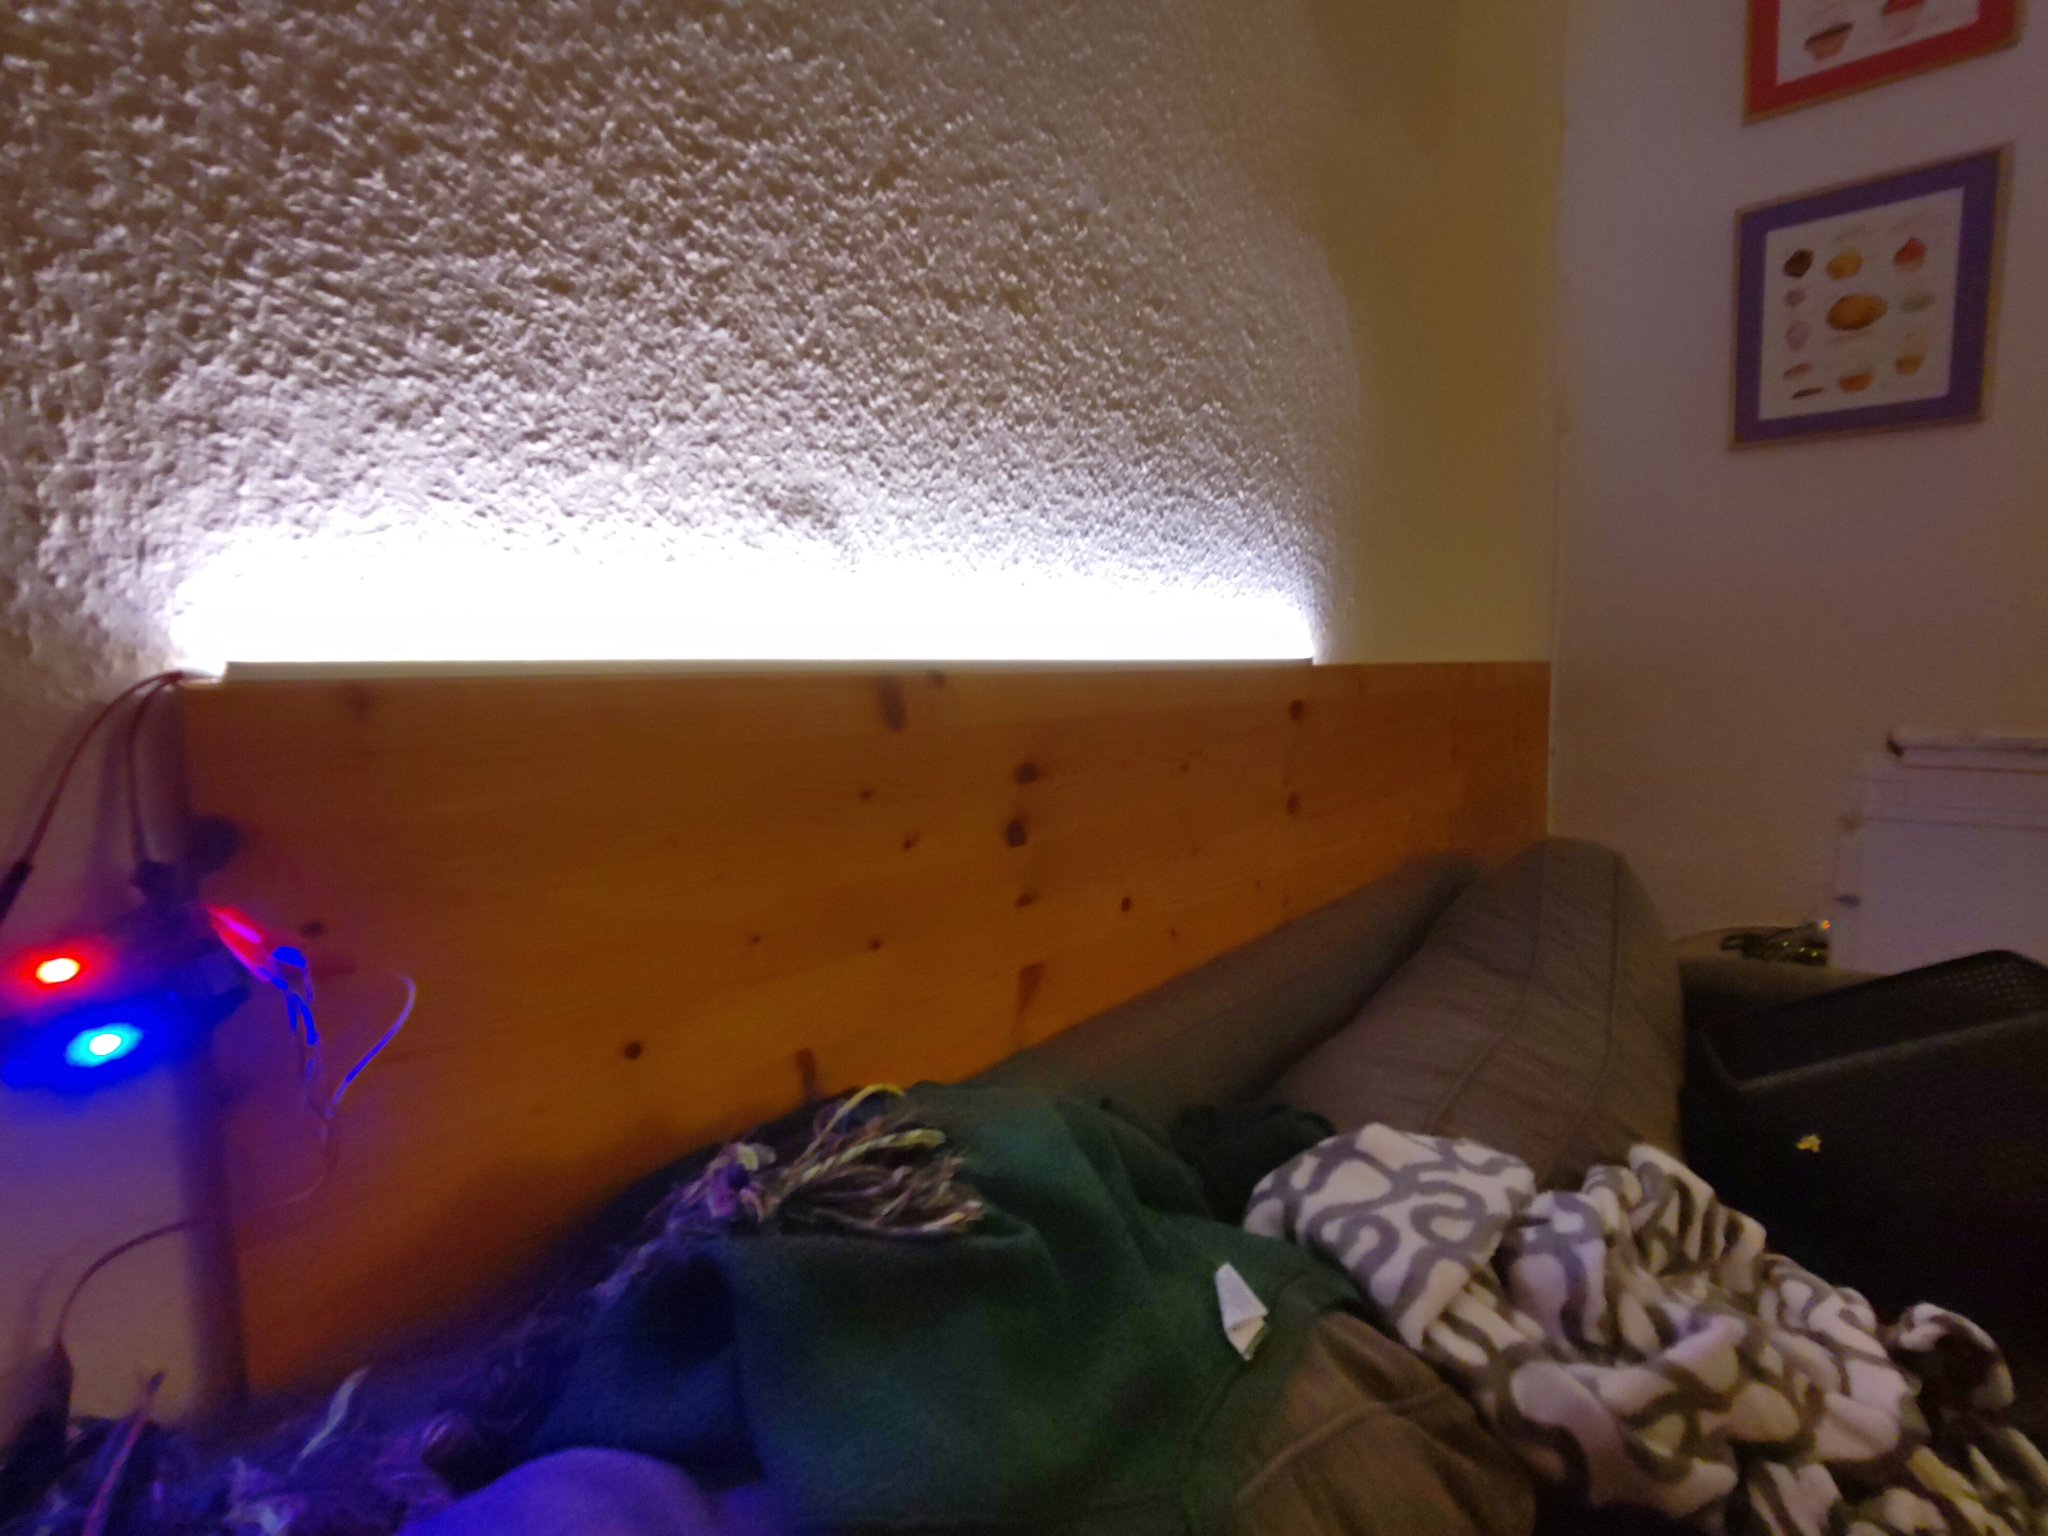
I can cycle between the different LED colors with the button, and change the level of each color with the potentiometer. This lets me tune the color temperature of the LED bar. In the future, this will also be controllable over the network.
I also used some wire-wrap wire to firmly attach the LED bar to the Powerbus Mini, which is currently hanging out behind my couch.
Activity Tracker Block Diagram and thread
Okay! Lunch has happened, and I've written up my initial thoughts here, I'll keep progress updated here on twitter, and on my lab notebook!
— james.poll_on()?; (@bitshiftmask) January 7, 2022
First up: assembling the expansion card, and building a couple of wiring harnesses. Stay tuned for more pics!https://t.co/4tDIMMee50 pic.twitter.com/Jv2tOGpqh3
As a larger, more directly usable project, I started working on an "activity tracker", which will let me log certain activities, like eating well, or going on a walk, or taking time to meditate or read a book, to give me a visible "health bar" of how well I'm taking care of myself.
For input, I'm using a Solder Party Keyboard FeatherWing, which has a Blackberry Q10 keyboard, and a 320x240 LCD display.
Activity Tracker Parts Connected
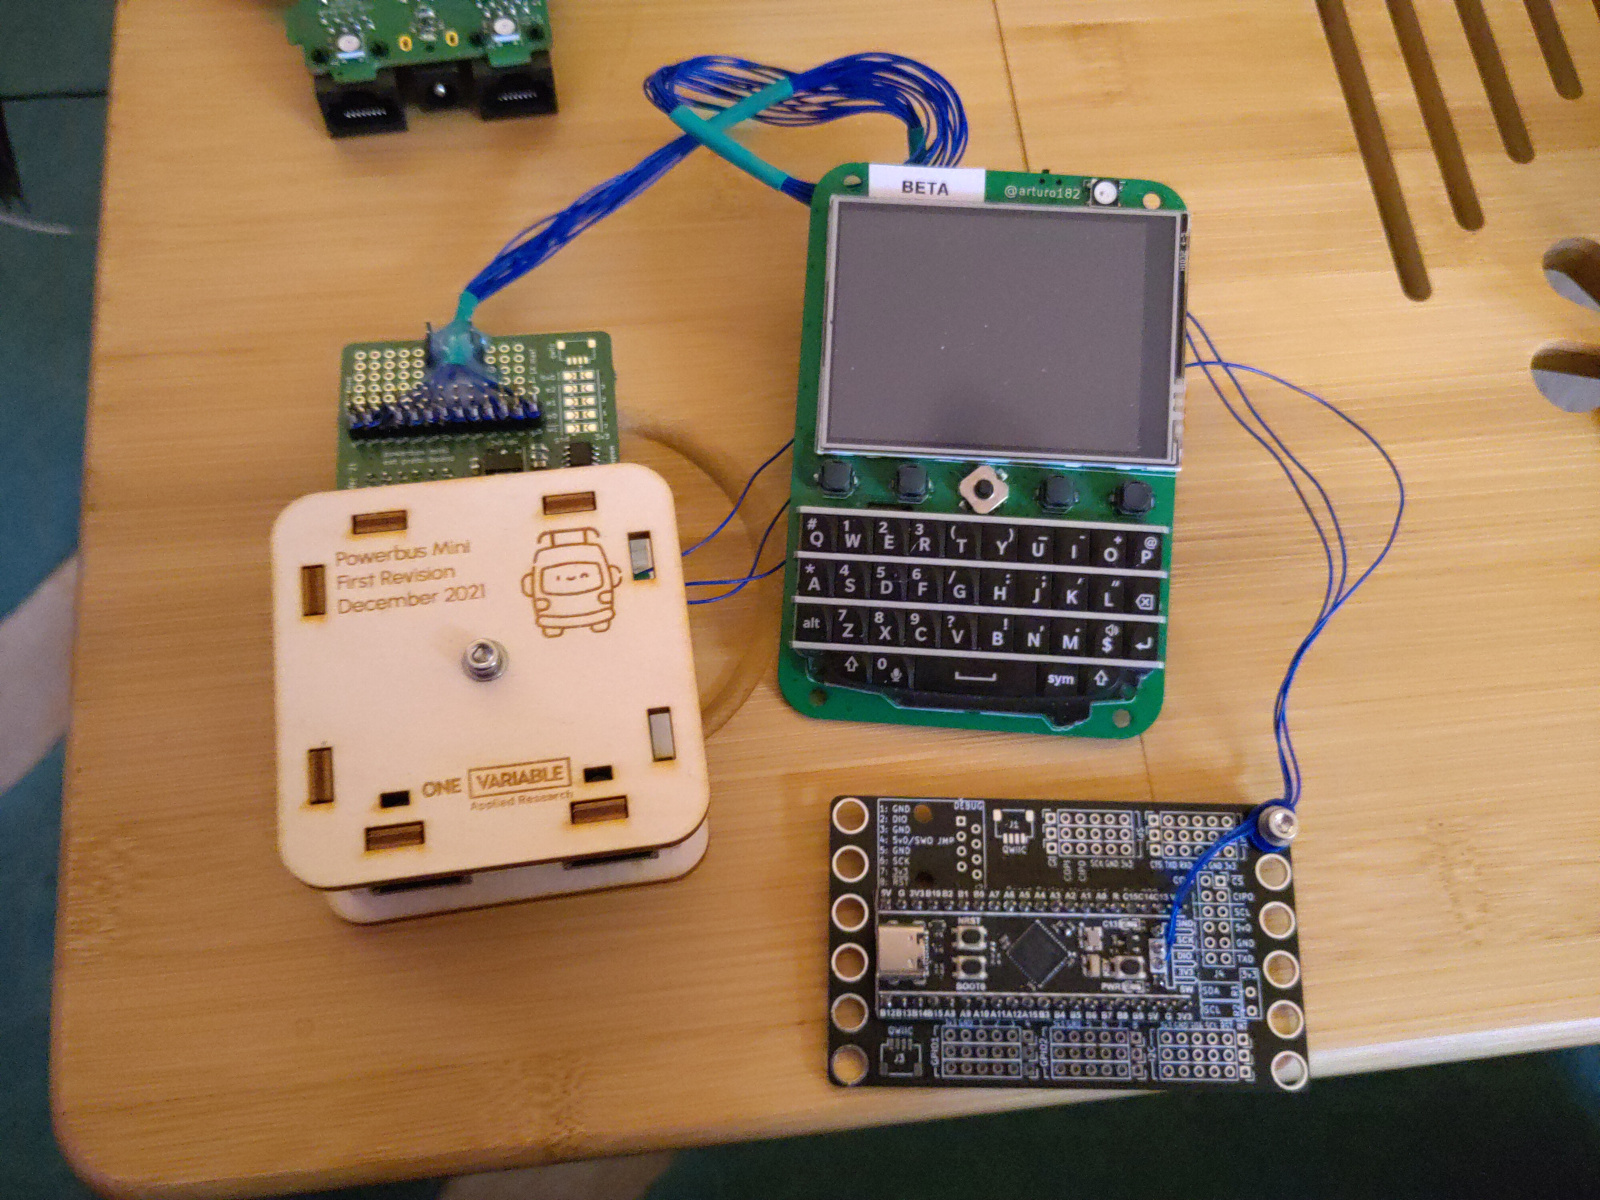
Since the Keyboard FeatherWing has an Adafruit Feather slot on the back for the main microcontroller, I needed an adapter to connect the LCD SPI and Keyboard I2C lines to the Powerbus Expansion card.
I built a wiring harness using an expansion card on one side, and a FeatherWing Proto board on the other side.
Wire Wrapped Board Connections
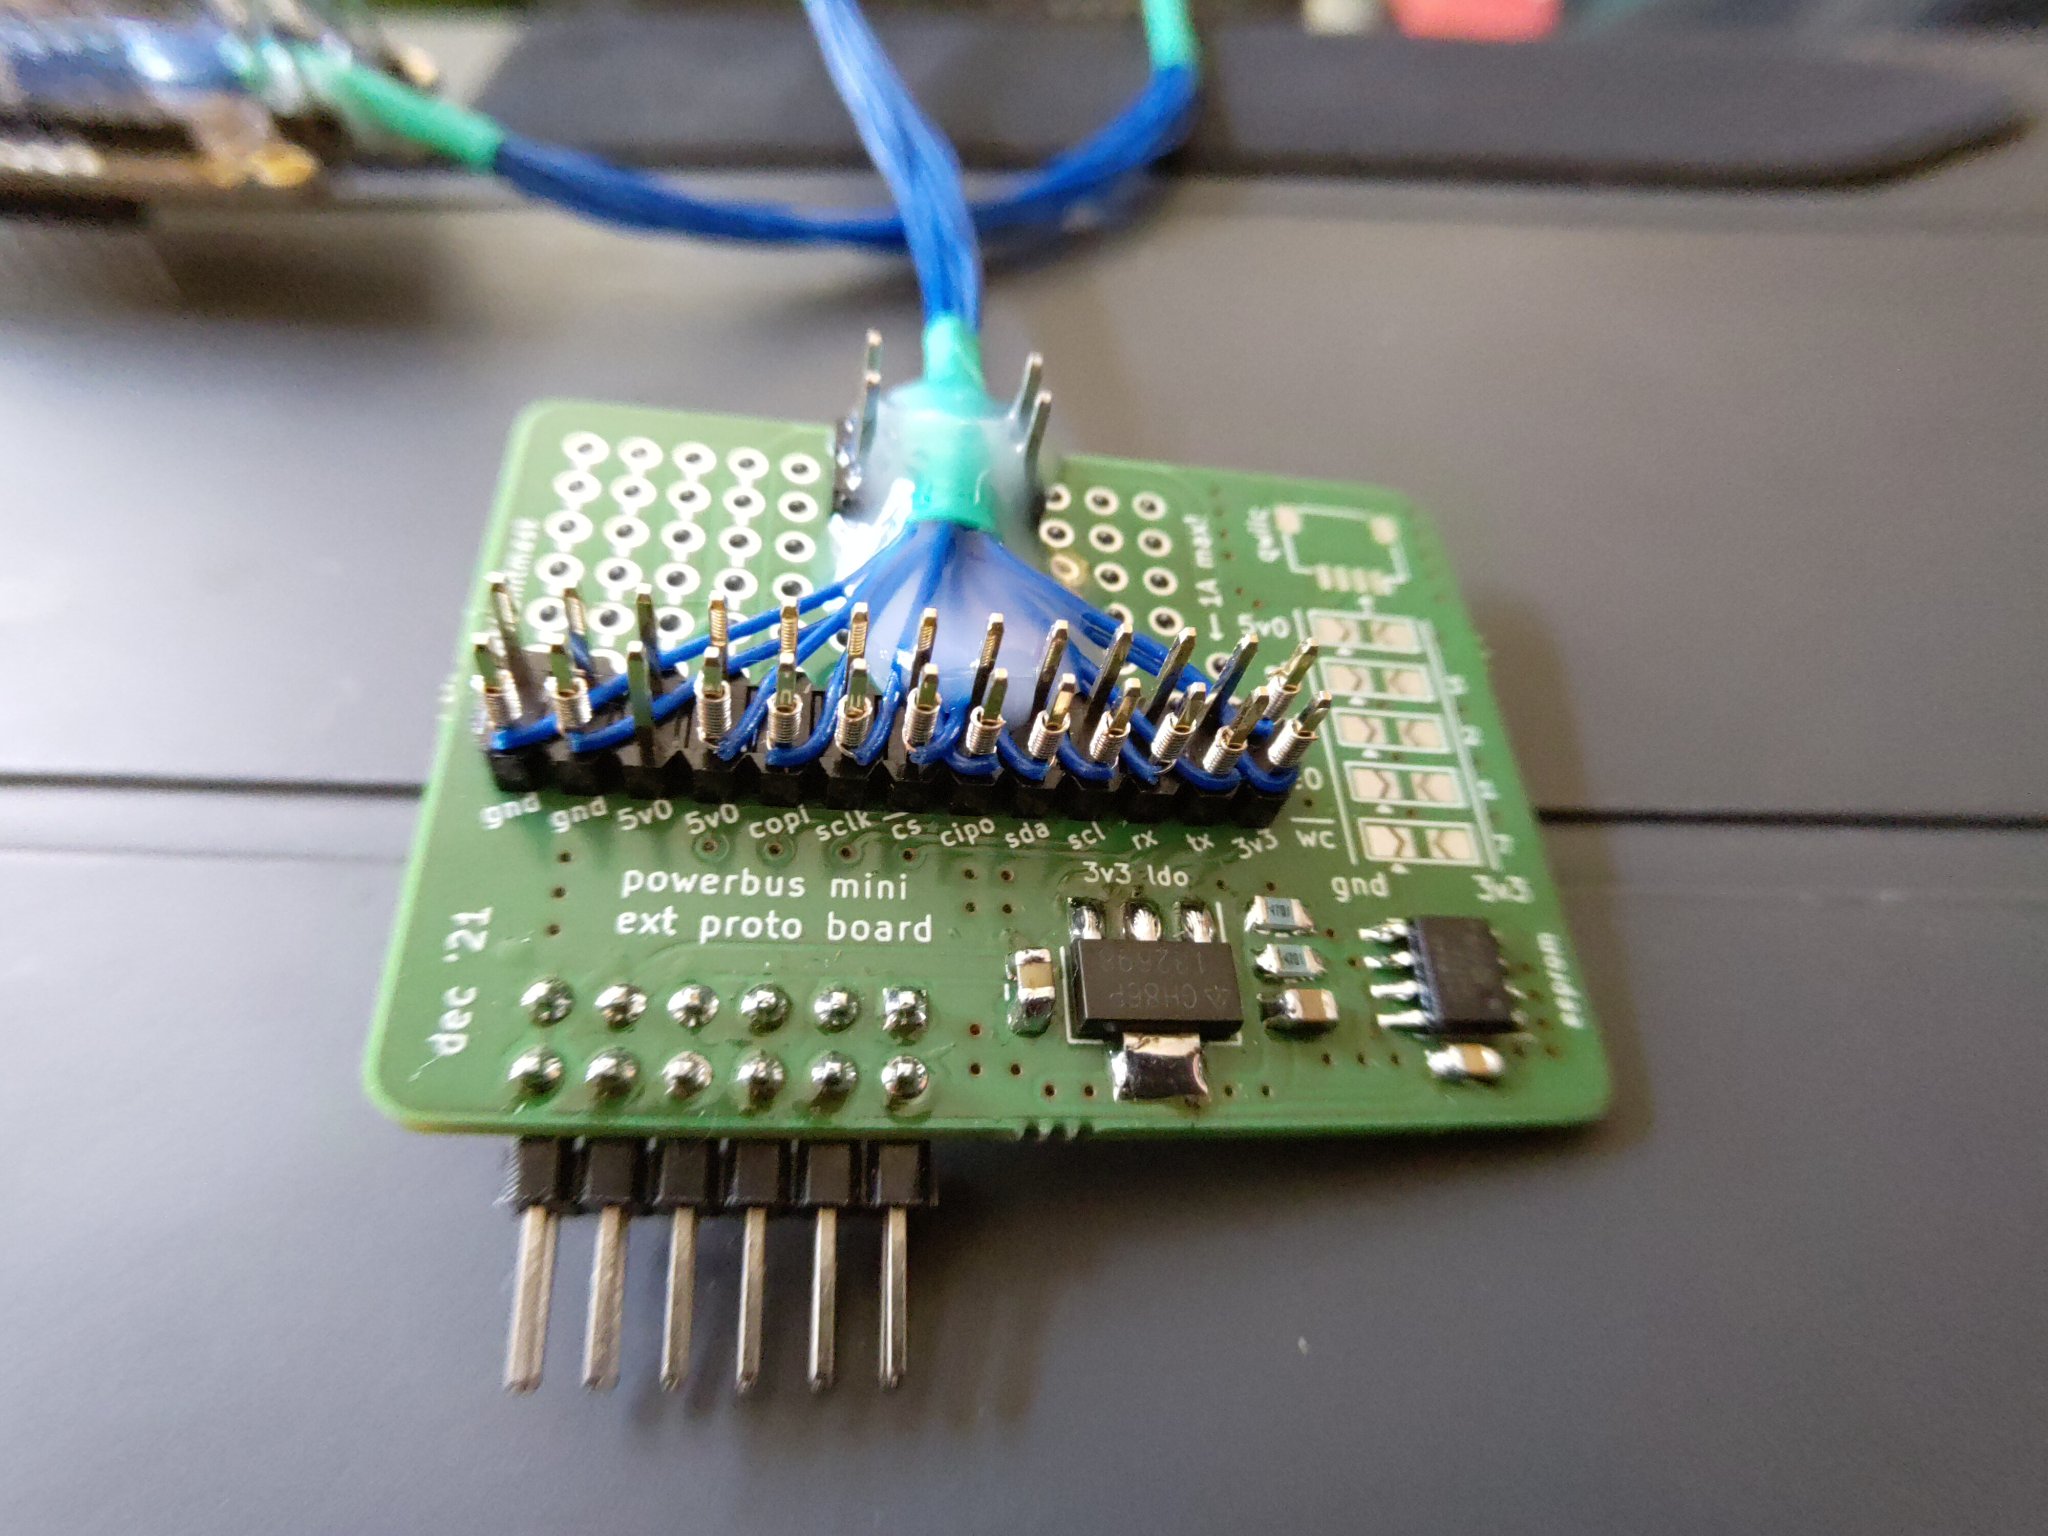
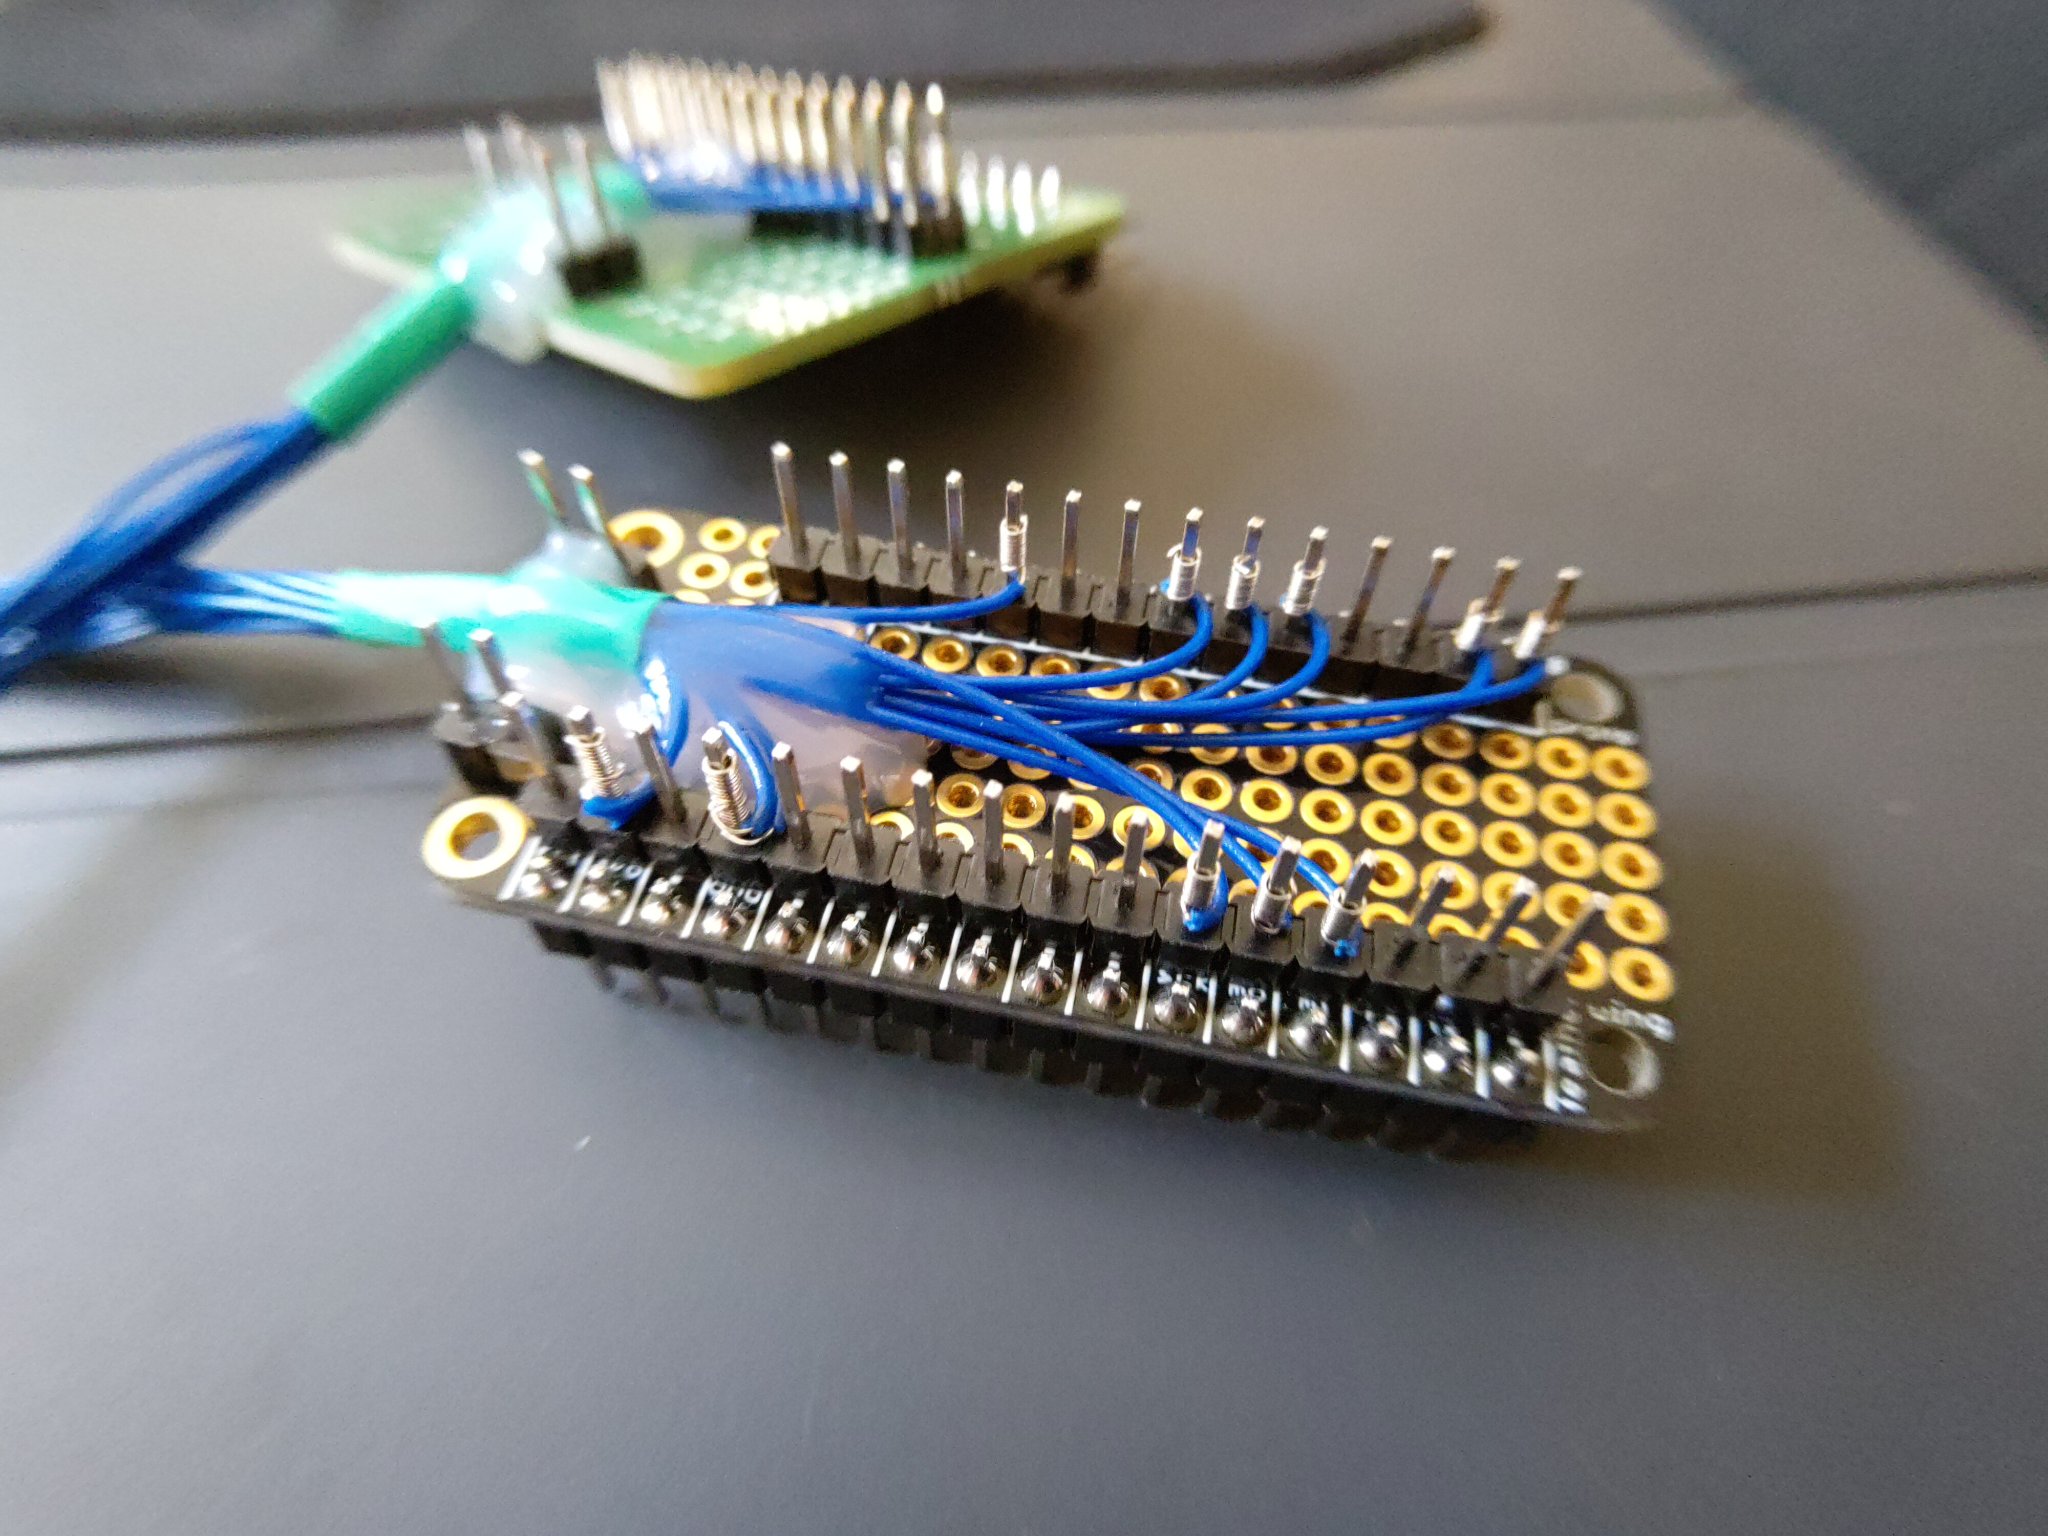
I used wire wrapping to make the connections, with a bit of hot-glue to act as strain relief on each side. This should be reliable enough for now, and might even serve as the final "production" cable, if it ends up being long enough. I plan to mount the Keyboard FeatherWing on a flexible cable with a "holster", sort of like the Video Game Kiosks you'd see in stores.
Hackaday Wire Wrapping Introduction
PC-side UI mock-up
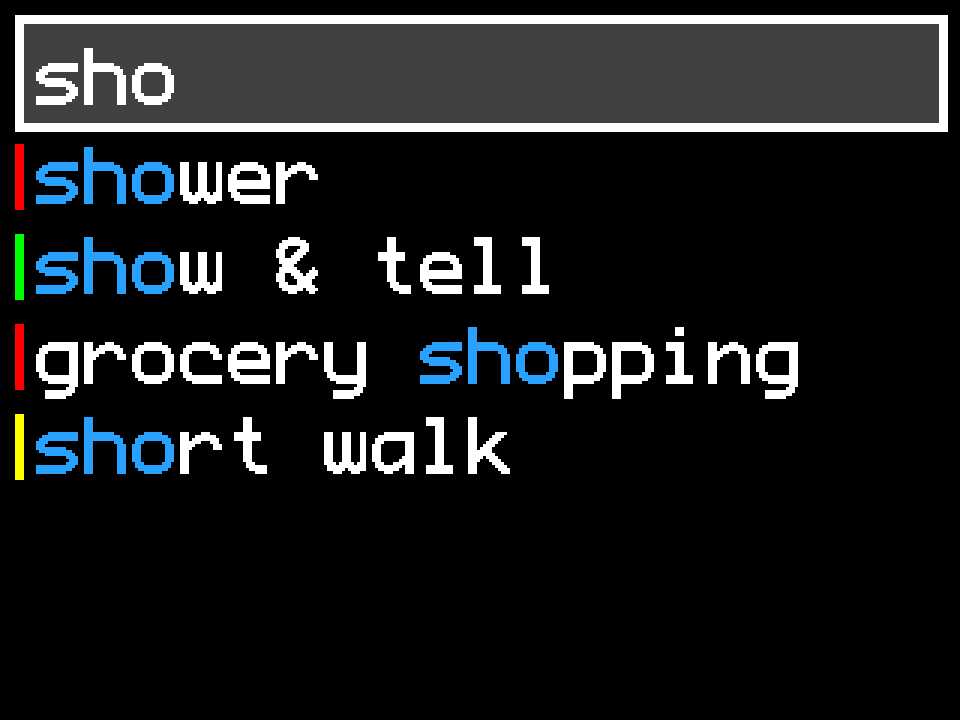
I spent some time with the embedded-graphics crate to build a user interface for the tracker. Since embedded-graphics come with an excellent simulator, I was able to prototype and build this quickly on my PC, and transfer the code 1:1 to the Powerbus hardware.
I took some videos of the menu drawing on the Powerbus Mini assembly, as well as a recording of the desktop simulator showing the "fuzzy search" and selection interface.
Drawing on-target
And of course it looks lovely on-device too (some of the delays are intentional, some aren't, though I haven't optimized any of the font drawing yet) :D pic.twitter.com/Ky0eTB5Eoi
— james.poll_on()?; (@bitshiftmask) January 9, 2022
Fuzzy search
Now with selection and confirmation!
— james.poll_on()?; (@bitshiftmask) January 9, 2022
Just need to add a simple "add new activity" screen, then I should be good to start moving this over to the hardware. pic.twitter.com/vshZGKIpzz
Finally, I was able to write and publish the toml-cfg crate, which I plan to use to simplify some of the ubiquitous const-generic parameters I use across the Anachro network stack.
If you find yourself looking for configuration values that aren't binary flags like Cargo supports, it might be a useful way to move those from code into a config file!
Suggestions for Future Research
Phew! That was a lot of fun and small projects. But it's probably about time to get the network stack verified, so I can make sure the RS-485 hardware works, and make the next hardware revision fixing a couple of the known papercuts with the current Powerbus-Mini hardware.
I'll probably aim to keep that as my primary focus, with the activity tracker as my fun back-up project.
Stay tuned for more updates, and thanks for following along!
A quick request!
I'd super appreciate it if you could share this newsletter with other folks who are interested in hardware, tooling, or embedded Rust.
Sending it along in your favorite Discord or Slack channels, on Twitter or other social media, or just forwarding the email would help me out a lot!
If they are interested in subscribing (or if you had this forwarded to you), they can subscribe to the newsletter here! I also post these newsletters a week later on my blog, which has an RSS feed you can also subscribe to.
Thanks again for subscribing and following along :)